


Free shipping
Delivery address
Free shipping
Local delivery
Estimated delivery: 23 - 26 October
Select your address, find out the delivery date!
Trendyol's commitments
Easy and free return in 15 days.
Payment methods


Highlighted features:
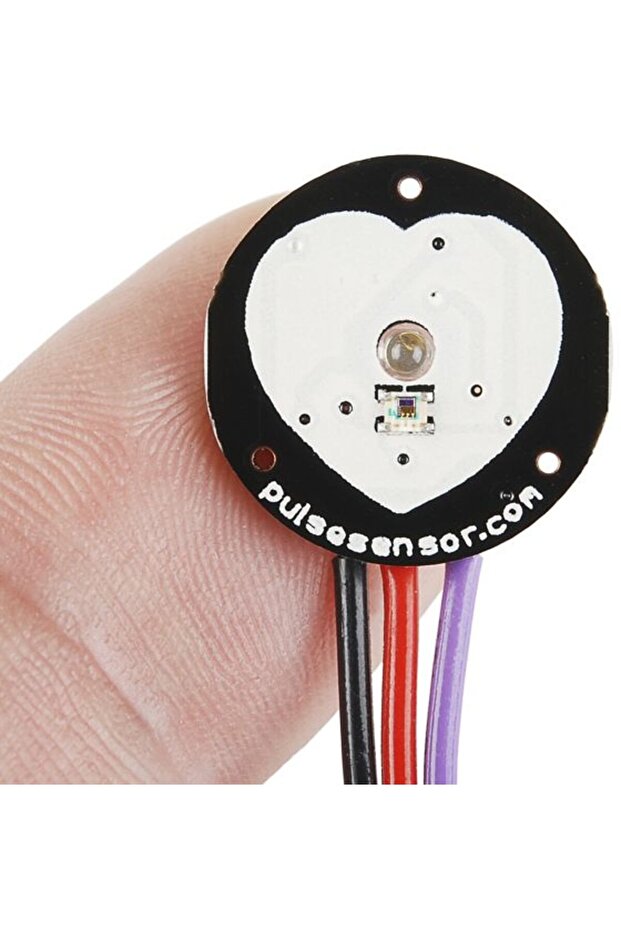
Generic 2A8 Pulse sensor Heart Rate Sensor Pulse Sensor module features
Other Features
Plug and Play, Small size and embeddable into wearables, Compatible with any MCU with ADC, Works with 3V or 5V, Well-documented Arduino library, Integrated amplifying and noise elimination circuit, Low power consumption, Reverse protection diode, User-friendly design (heart logo, green LED, ambient light photosensor)
Instructions for Use/Warnings
How to Use: The LED on the front side of the sensor is placed over a vein in our human body. This can either be your fingertip or your ear tip, but it should be placed directly on top of a vein. Wiring to Arduino: Connect three wires: two for power and one for reading the sensor value. The module can be supplied with either 3.3V or 5V. Positive voltage is connected to ‘+,’ while ground is connected to ‘-.’ The third ‘S’ wire is the analog signal output from the sensor, which will be connected to the Arduino’s A0 analog input. Library Installation: To run sketches, install the ‘PulseSensor Playground’ library. Navigate to Sketch > Include Library > Manage Libraries…, filter by ‘pulsesensor’, and install. Example Usage: Access example sketches via File > Examples > PulseSensor Playground. Load the GettingStartedProject sketch, upload the code to your Arduino, and clip the sensor to your earlobe or fingertip. The Arduino’s onboard LED should blink with your heartbeat.
Blue PCB Electronics
7.8
Seller information
Generic 2A8 Pulse sensor Heart Rate Sensor Pulse Sensor module reviews
No reviews yet.
Product details
Additional info
- Sold by .
- A maximum of 5 units of this product can be ordered. Trendyol reserves the right to cancel orders over 5 units.
- Barcode No: 2900000008601
Generic 2A8 Pulse sensor Heart Rate Sensor Pulse Sensor module features
Other Features
Plug and Play, Small size and embeddable into wearables, Compatible with any MCU with ADC, Works with 3V or 5V, Well-documented Arduino library, Integrated amplifying and noise elimination circuit, Low power consumption, Reverse protection diode, User-friendly design (heart logo, green LED, ambient light photosensor)
Instructions for Use/Warnings
How to Use: The LED on the front side of the sensor is placed over a vein in our human body. This can either be your fingertip or your ear tip, but it should be placed directly on top of a vein. Wiring to Arduino: Connect three wires: two for power and one for reading the sensor value. The module can be supplied with either 3.3V or 5V. Positive voltage is connected to ‘+,’ while ground is connected to ‘-.’ The third ‘S’ wire is the analog signal output from the sensor, which will be connected to the Arduino’s A0 analog input. Library Installation: To run sketches, install the ‘PulseSensor Playground’ library. Navigate to Sketch > Include Library > Manage Libraries…, filter by ‘pulsesensor’, and install. Example Usage: Access example sketches via File > Examples > PulseSensor Playground. Load the GettingStartedProject sketch, upload the code to your Arduino, and clip the sensor to your earlobe or fingertip. The Arduino’s onboard LED should blink with your heartbeat.
Safety information
Product safety information